This post may contain affiliate links. Read disclosure policy
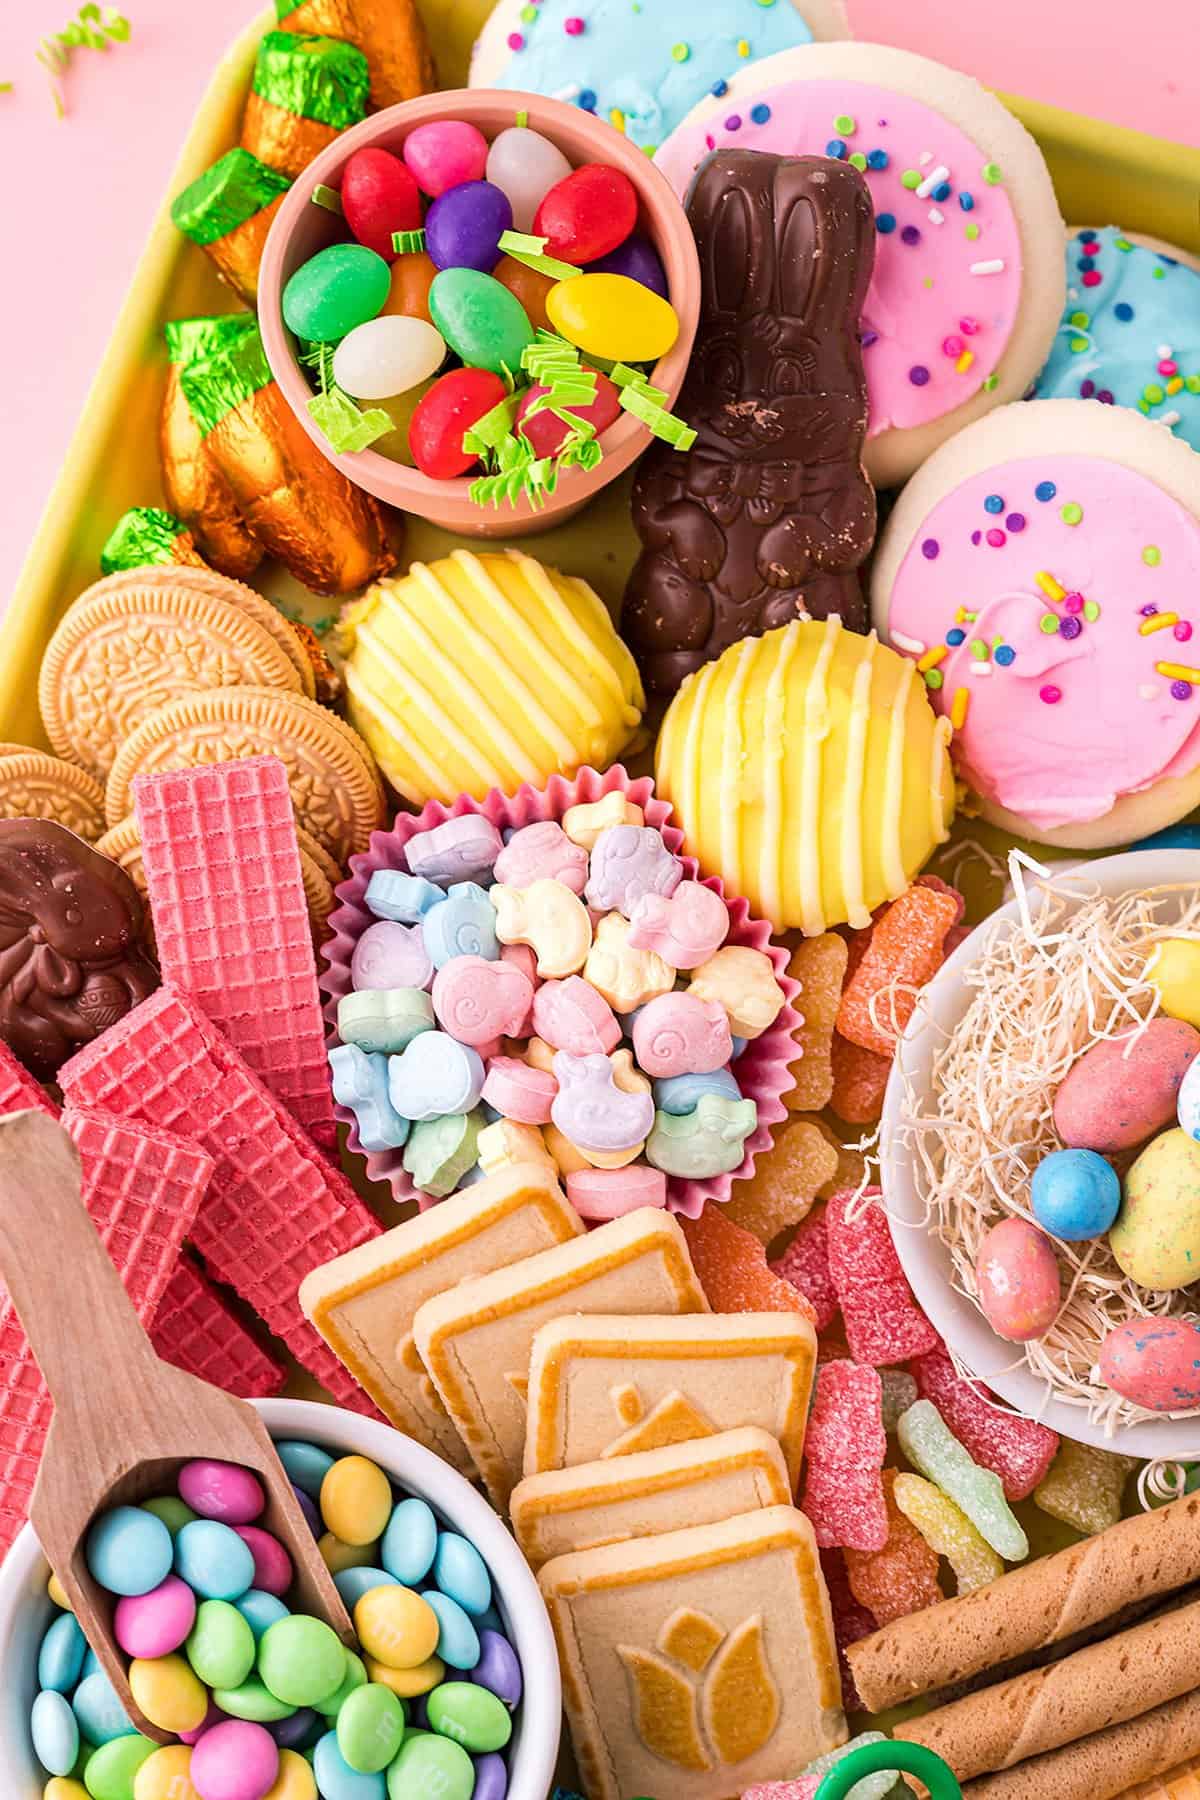
This Easter Charcuterie Board is loaded to the max with colorful candies, cookies, & chocolates! Friends and family love this colorful snack board and it makes a memorable dessert for Easter.
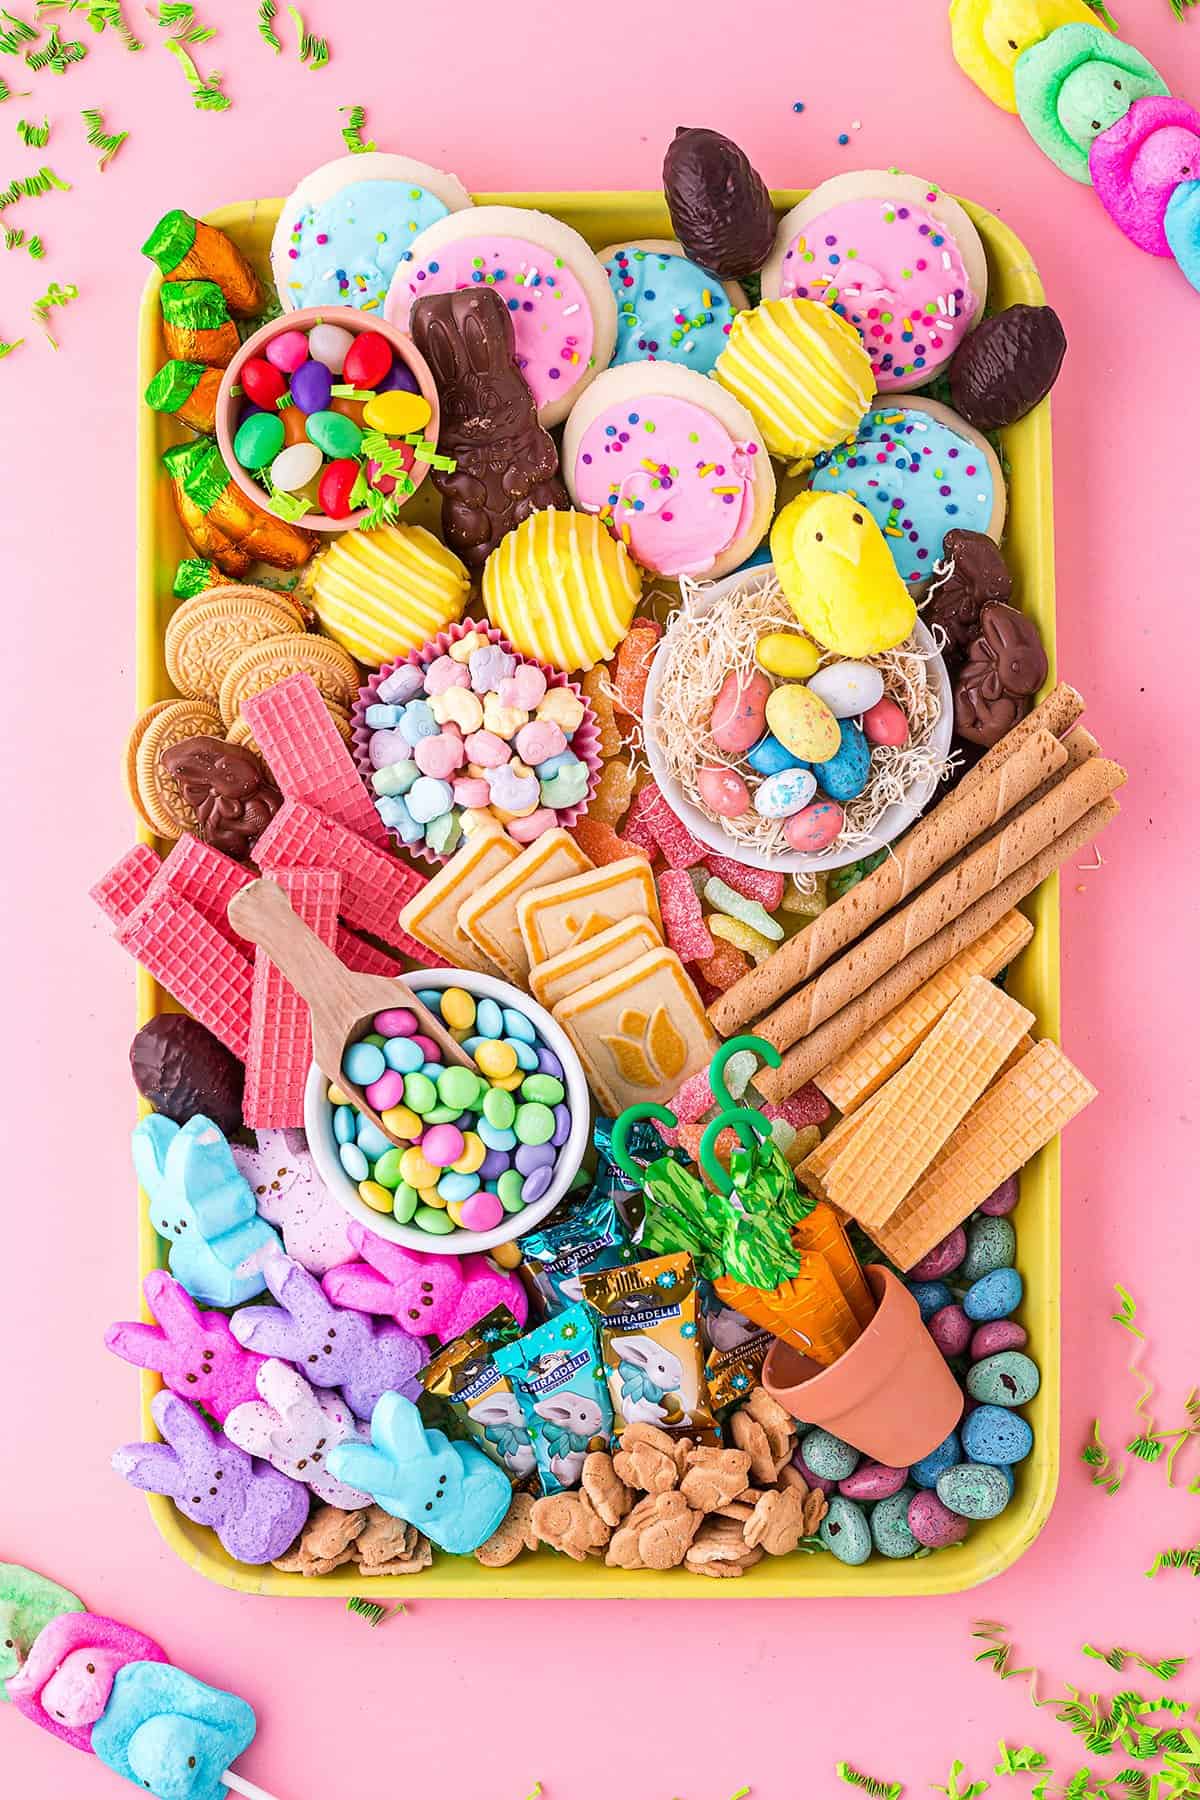
Alright, alright. Technically, this isn’t charcuterie, since there are no meats involved, but I’m calling this an Easter Charcuterie Board anyway, because charcuterie is so trendy and fun!
Call it and Easter Snack Board or an Easter Dessert Board if you like!
This is perfect for all ages, a huge hit at any Easter gathering, and just so fun and colorful!
Trust me when I tell you that my children (aged 17 and 22) get that Christmas morning level excitement when they see me whipping up a fun snack board, like our St. Patrick’s Day Board!
This is one of those fun little ‘recipes’ that are easy to customize and tweak until it looks just right and uses exactly the treats you like, so have fun with this one!
Ingredients Used:
This post contains affiliate links. As an Amazon associate and member of other qualifying programs, I earn from qualifying purchases.
This probably seems like a lot of stuff! It is. It might even be overkill, but that’s sort of the point with a snack board like this. You may need to shop around if you want to build exactly the same Easter board as the one featured here.
Or you can just get creative and grab some Easter themed goodies and colorful candies, eggs, and chocolate bunnies for example from the local grocery store!
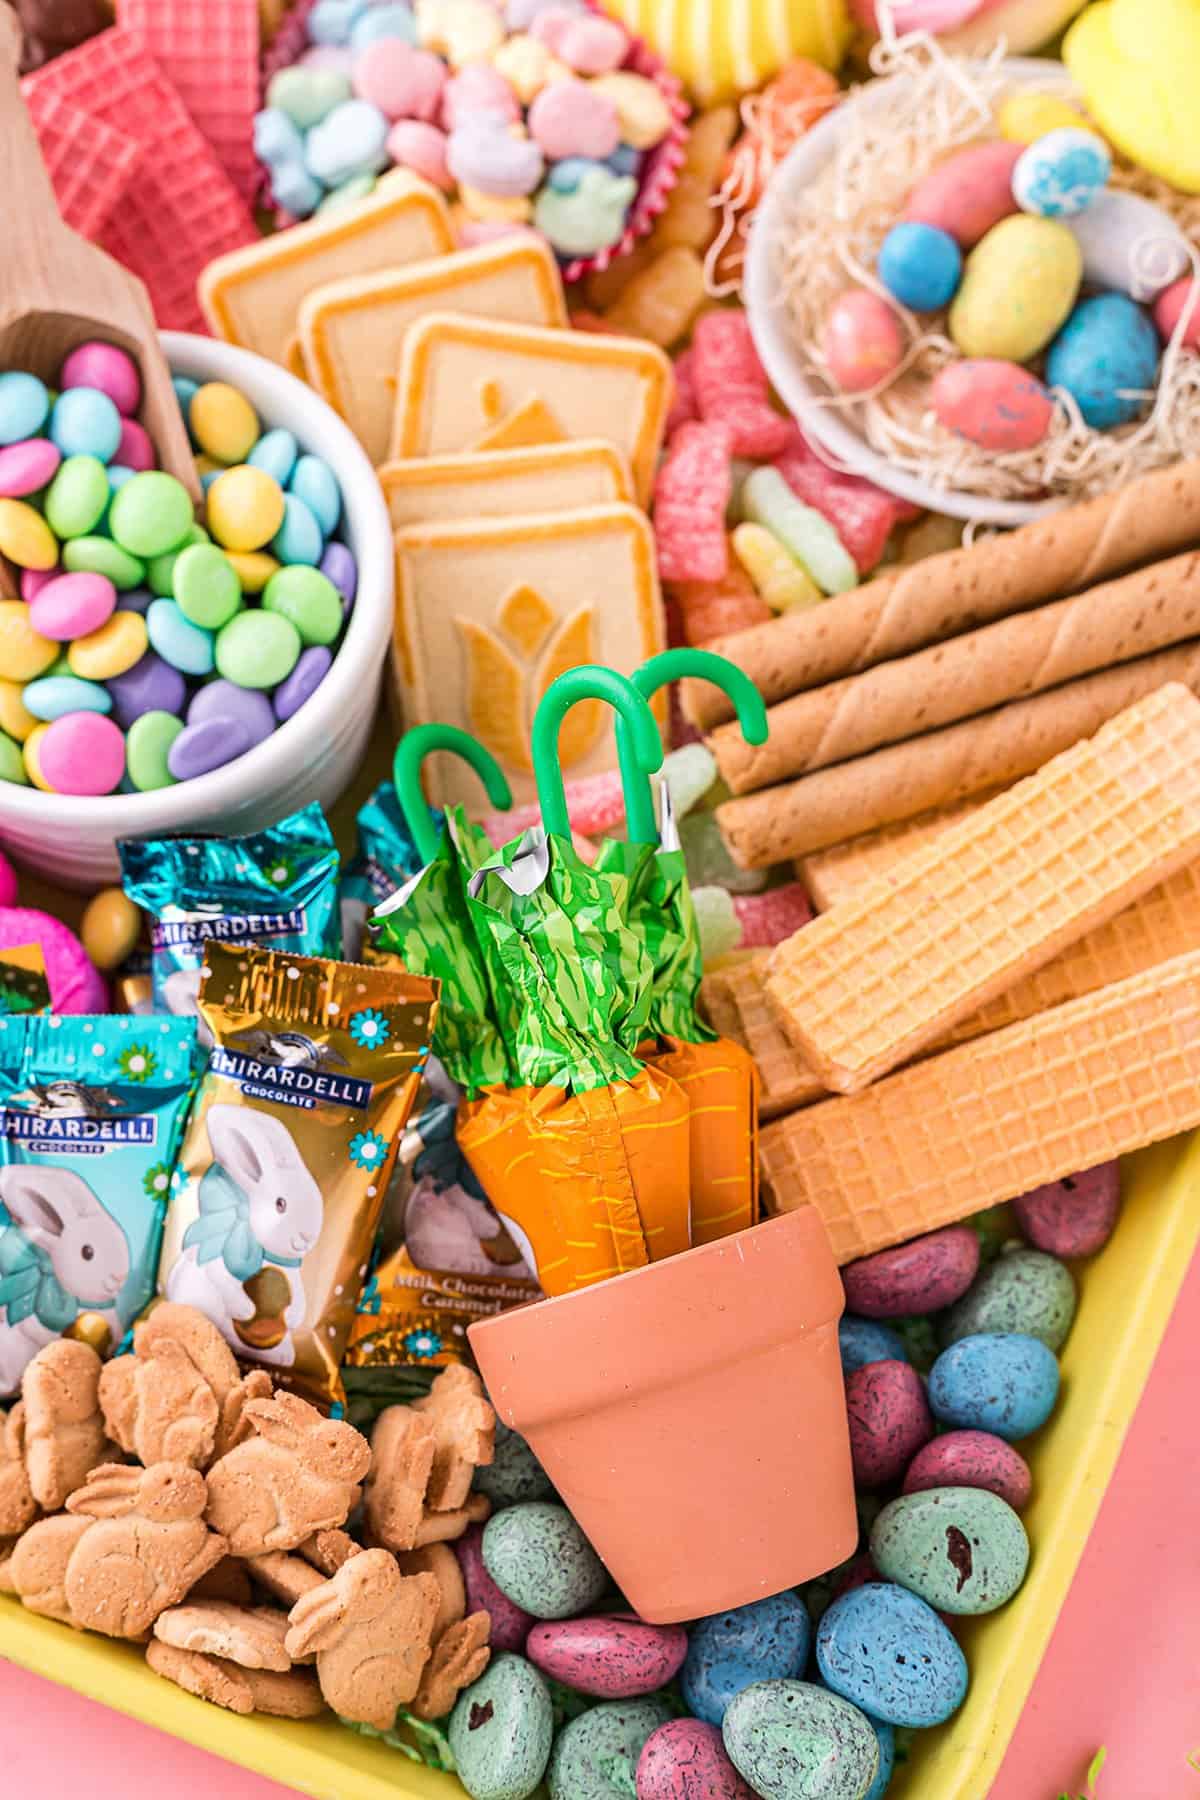
Pepperidge Farm Chessmen Butter Cookies
Pepperidge Farm French Vanilla Pirouettes
Ghiradelli Milk Chocolate Bunnies
Peeps Marshmallow Easter Bunnies
Palmer Double Crisp Bunny Treats Carrots
Russell Stover Marshmallow Eggs in Chocolate
Russell Stover Milk Chocolate Peanut Butter Rabbit
Annie’s Snickerdoodle Bunny Grahams
Sweetarts Easter Candy Chicks, Ducks, & Bunnies
Brachs Classic Jelly Bean Bird Eggs
Green Shredded Coconut – You’ll need some green food coloring to go with this. See the how to make section below for turning it into “grass”. It’s simple!
Tools Needed:
Yellow Tray – This is just if you want it to look like the photos. You can really use any tray that you like. I think the yellow tray makes for a good contrast with the other colors that will fill it up.
Clay Pots – I used some small clay pots from Walmart to hold some of the sweets if you’re going for the same look. And some small white bowls or really any sort of decorative bowl that would fit with the colors should work.
How to Make A Snack Board:
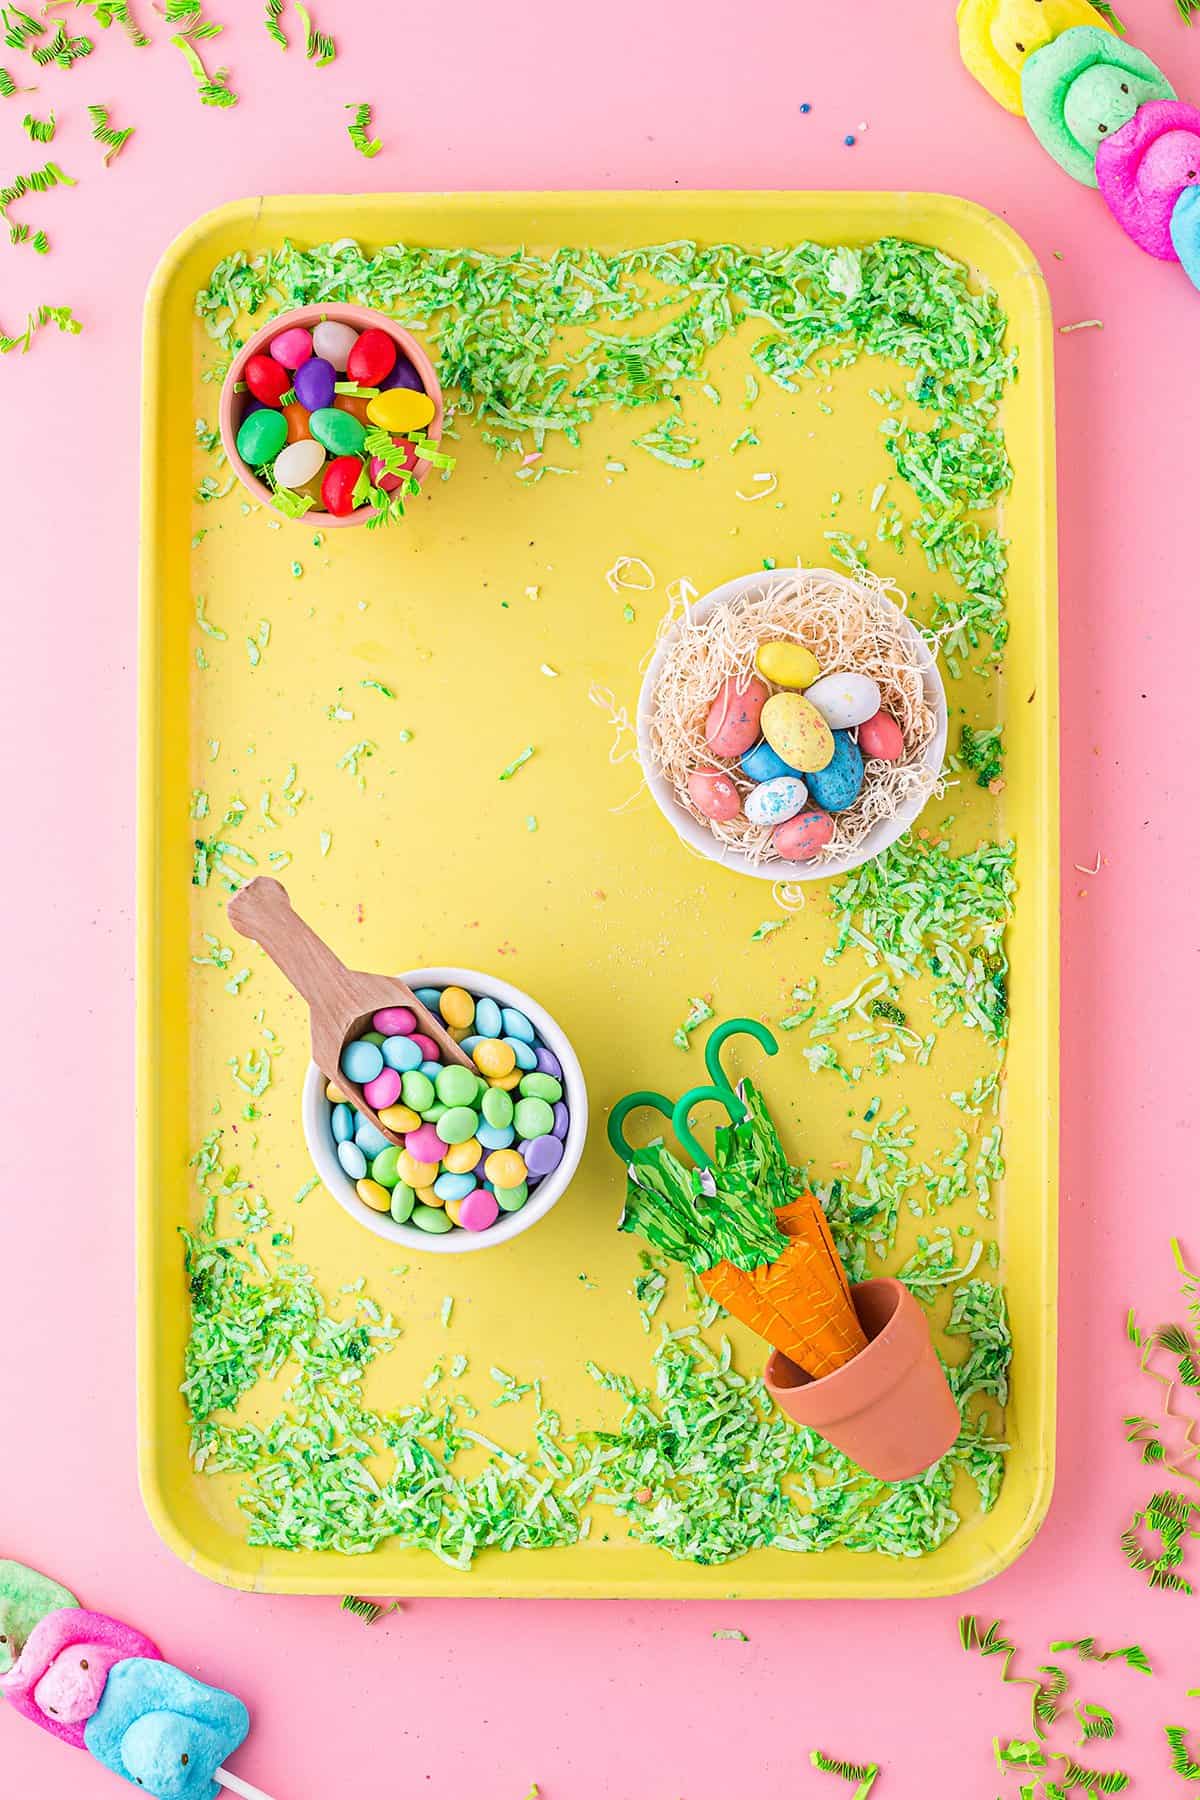
Coconut Grass: This is really easy to do. It is optional, but it’s the perfect (and edible) way to fill out some empty spaces. Add the coconut shreds to a ziplock bag with three drops of green food coloring, then shake it up and sprinkle it around the board.

Pots & Bowls: It helps to start with any decorative containers like the pots or the bowls. Figure out where you want those to go, and then fill them up with whatever looks best. I used the clay pots for the chocolate carrots and jelly bean eggs, and the bowls for the robin eggs and M&M candies.
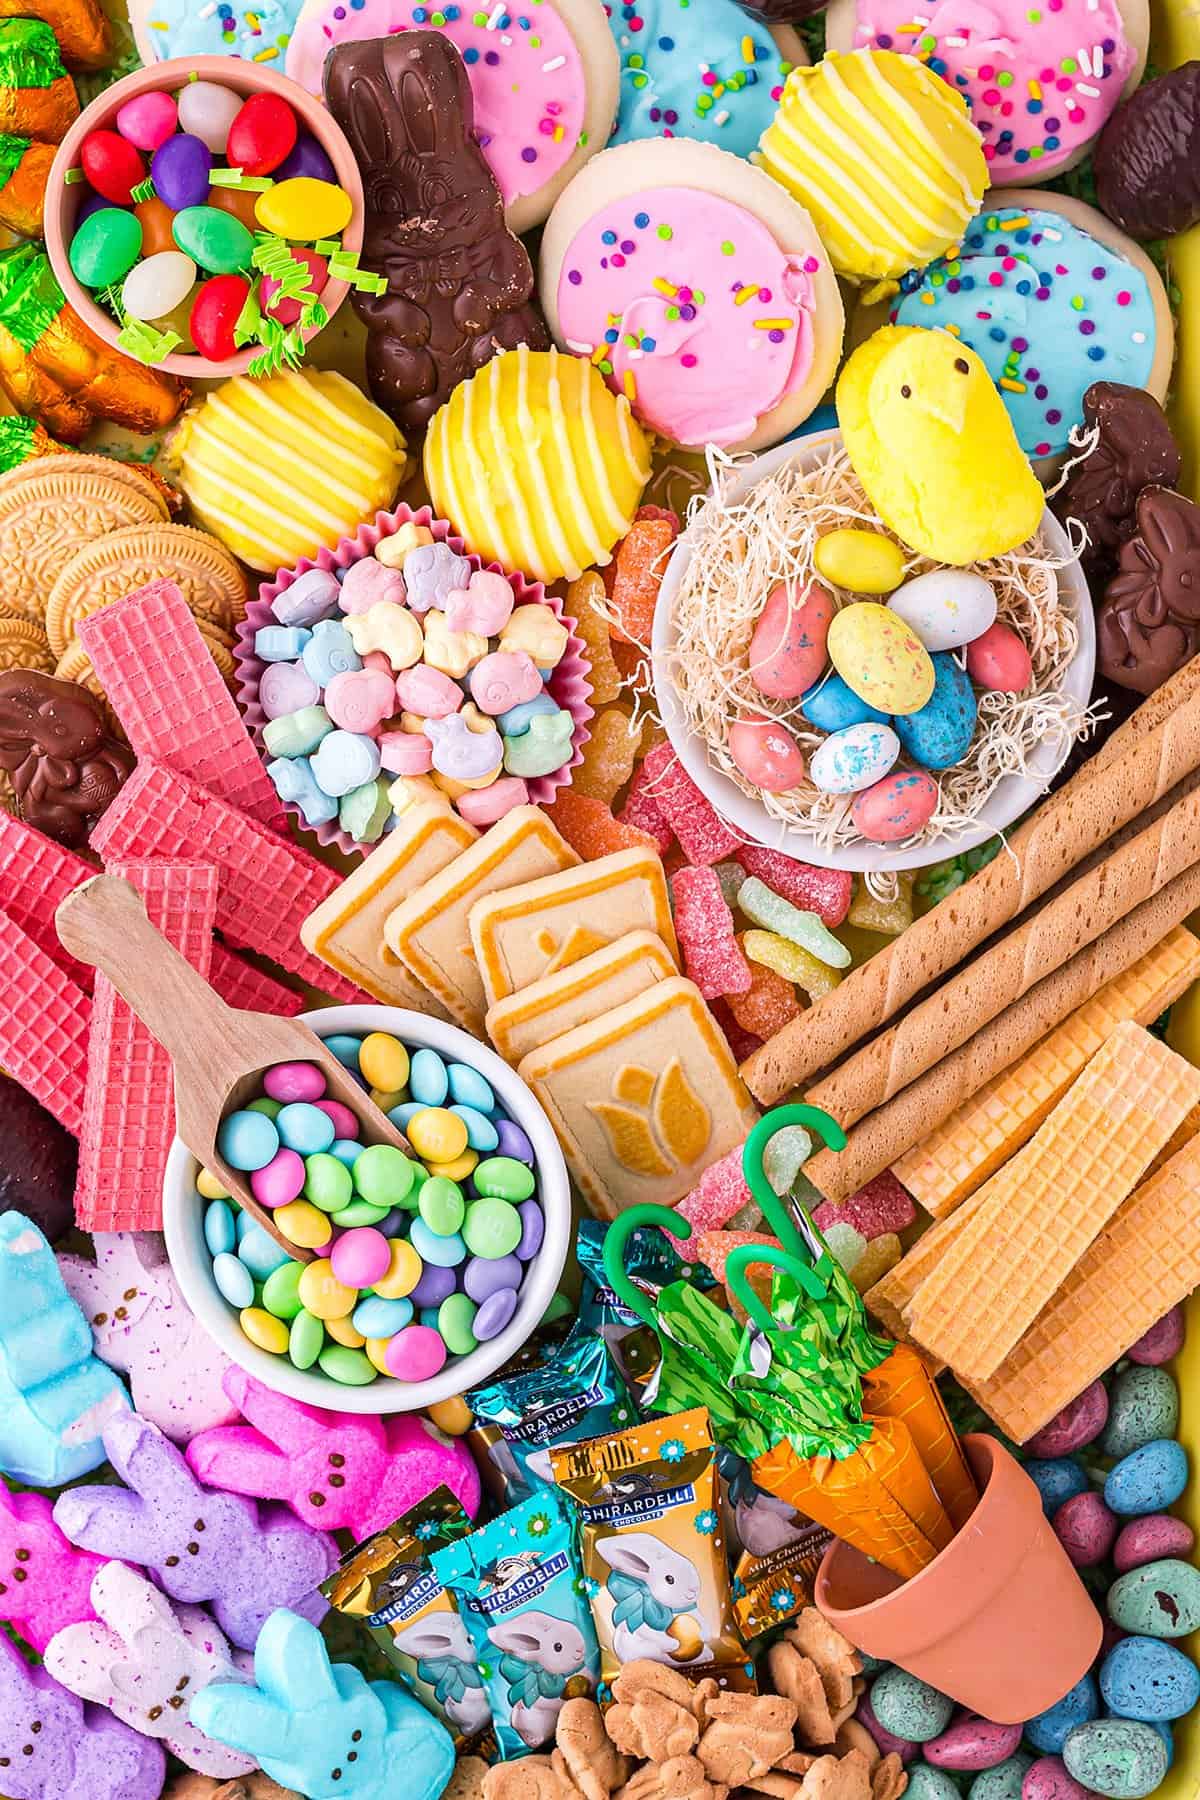
Load it Up: I think the best way to make a beautiful snack board is to just go crazy! Load it up with piles of goodies and make it look like it is bursting with treats. Make sure there aren’t any gaps or empty spaces. The green coconut “grass” is a good way of filling out any of those spots. More tips below!
Snack Board Tips & Tricks
These tips and tricks apply for just about any type of snack board, dessert board, or charcuterie board recipe. So whether you’re piling it up with sugary treats or savory meats keep these tips and tricks in mind!
- Board: Whatever type you’re making you’ll obviously need an appropriate board or platter to go with it. They come in all shapes and sizes; some are simple, some are fancy, and some are even themed for holidays or events! We’ve even used sheet pans as the base for our snack board!
- Size: Before choosing a charcuterie board you’ll want to keep in mind just how much food you plan to put on it. The bigger the board, the more you’ll need to add to fill in all the spaces to keep it looking as appealing as possible.
- Shape: There is no rule for what shape of board to use. They are usually either rectangular or circular. Just pick whichever you feel is going to look the best for the theme you are going for!
- No Board: You can’t have a snack board, dessert board, or charcuterie board without a board! Or can you? You could lay down some parchment paper (or butcher’s paper) over a table and arrange the goodies on it if you don’t have a board or platter.
- Appeal: A lot of the appeal of a snack board is visual! When you see all those colorful candies, chocolates, and treats (or meats if you’re going for charcuterie) it’s supposed to look a bit overwhelming. You want guests to be wowed and a little bit unsure of where to start, because there are just so many tasty options.
- Color: In a dessert or snack board (and especially in this Easter themed board) you’re going to want to have as much color as possible, arranged artfully to look as appealing as possible! Think of a basket full of colorful Easter eggs. You want all those colors here, along with some green which is a good Spring color!
- Space: Nothing is sadder than a snack board with lots of gaps or empty spaces. You want the board to look like it is bursting with snacks! Fill in as many gaps and empty spaces on the board as you can so that it’s totally packed with snacks, treats, or meats! When you think you’ve added enough, go back and sprinkle in a little more.
- Variety: Go for lots of variety! If you’ve only got a few snacks to choose from you may want to opt for a smaller board.
- Quantity: I prefer variety over quantity on a snack board, so you don’t need to have a huge amount of each treat unless you’ve got room to fill in. So you don’t need to use an entire package of each treat and you’ll likely have leftovers. If we’re having a large party, we often refill the board after guests have gone through the first time. It keeps it looking full when people come back for more.
- Budget: Snack boards do cost a bit of money to prepare, because you’re just buying such a large variety of goodies. You can keep it more budget friendly by limiting yourself to 4-5 varieties of treats and just create several different piles of each treat rather than keeping them all grouped together. This will make the board look more visually appealing.
FAQs:
That’s where the artistic or creative part of a charcuterie board comes in. It’s really up to you how you want to arrange it so go for appealing as possible. I’d recommend starting with any bowls or containers, filling those up, and then adding in the other items.
I’m just calling it an Easter Board, but it could be referred to in a few different ways. Snack board, dessert board, or dessert charcuterie board. They all work!
Leftover Hack!
You’re bound to have leftover treats after building your board. We always keep some on hand to refill after guests have made their first pass over the board, but leftover treats can also be packaged up into small goodie bags for guests to take home if you don’t like a bunch of candies tempting you in the cupboard.
EASTER SIDE DISH RECIPES!
Don’t forget all the great side dishes to go with your big Easter dinner! And if you’re still searching for a good main course, this spiral ham in the crockpot is a safe bet!
- White Cheddar Scalloped Potatoes
- Spinach Casserole
- Mac and Cheese Casserole
- Jiffy Corn Casserole
- Air Fryer Green Bean Casserole
- Instant Pot Mashed Potatoes

Easter Charcuterie Board
Ingredients
- 6 Frosted sugar cookies
- 3-5 Mini Lemon Bites
- 6 Vanilla Wafers
- 6 Strawberry Wafers
- 6 Golden Oreo’s
- 6 Pepperidge Farm Chessman Spring shapes
- 6 Vanilla Pirouette
- 6-8 Ghirardelli chocolate bunnies
- 8-12 Bunny and bird Peeps
- 3-4 Lindt Chocolate Carrots
- 6 Palmer Double Crisp Bunny Treats Carrots
- 3 Milk Marshmallow Eggs
- 1 Solid Milk Chocolate Bunny’s
- 1 cup Annie’s Bunny Grahams
- 1 cup Spring M&M’s
- 1 cup Sweetarts
- 1 cup Junior Mints Eggs
- ½ cup Robins Eggs Malted Candy
- ½ cup Jelly Beans
- ½ cup Sour Patch Kids
- 1 cup Green Colored Shredded Coconut
Instructions
- Grab a large tray or plater, sprinkle green colored shredded coconut on the tray to create grass.
- Place all bowls and clay pots where you would like them.
- Fill bowls with spring M&M’s, Jelly Beans, Sweetarts, Robins Eggs, and Chocolate Carrots.
- Fill around the bowls with cookies and candy until the tray is completely full.
Tips & Notes:
section. If they don’t, you can get regular sugar cookies and add frosting and sprinkles to create your own theme. Making colored shredded coconut- Add shredded coconut to a large Ziplock bag, add 3 drops of green food coloring and shake the bag. This will dye all the shredded coconut. Where to purchase cute holiday shaped bowls- You can always find fun holiday shaped bowls at Hobby lobby, Michaels, Jo Ann Fabrics, Target, or even Walmart. If you want to you can even use cupcake wrappers for bowls.



Leave a Review