This post may contain affiliate links. Read disclosure policy
Leprechaun Oreo Pops are perfect for St. Patrick’s Day events! They’re an easy no bake dessert made with Golden Oreo cookies all crushed up and rolled into adorable little treats!

Would you like to save this?
If you’ve tried any of my dessert recipes, you’ve probably noticed that I don’t do a ton of cutesy, crafty treats that require lots of work or patience.
I LOVE to bake and make desserts, but I do not love spending hours decorating something just for someone to come and *gasp* take a bite out of my hard work. No, thank you.
However, these little Leprechaun Cake Pops are adorable! They look like you put some effort into them, but they really aren’t all that fussy and they come together with just 3 ingredients + sprinkles!
We’re making a batch of these with the kiddos for St. Patrick’s Day and serving them up after a dinner of corned beef and cabbage, colcannon, and Irish soda bread. It’s going to be a tasty day.
Ingredient Notes:
This post contains affiliate links. As an Amazon associate and member of other qualifying programs, I earn from qualifying purchases.
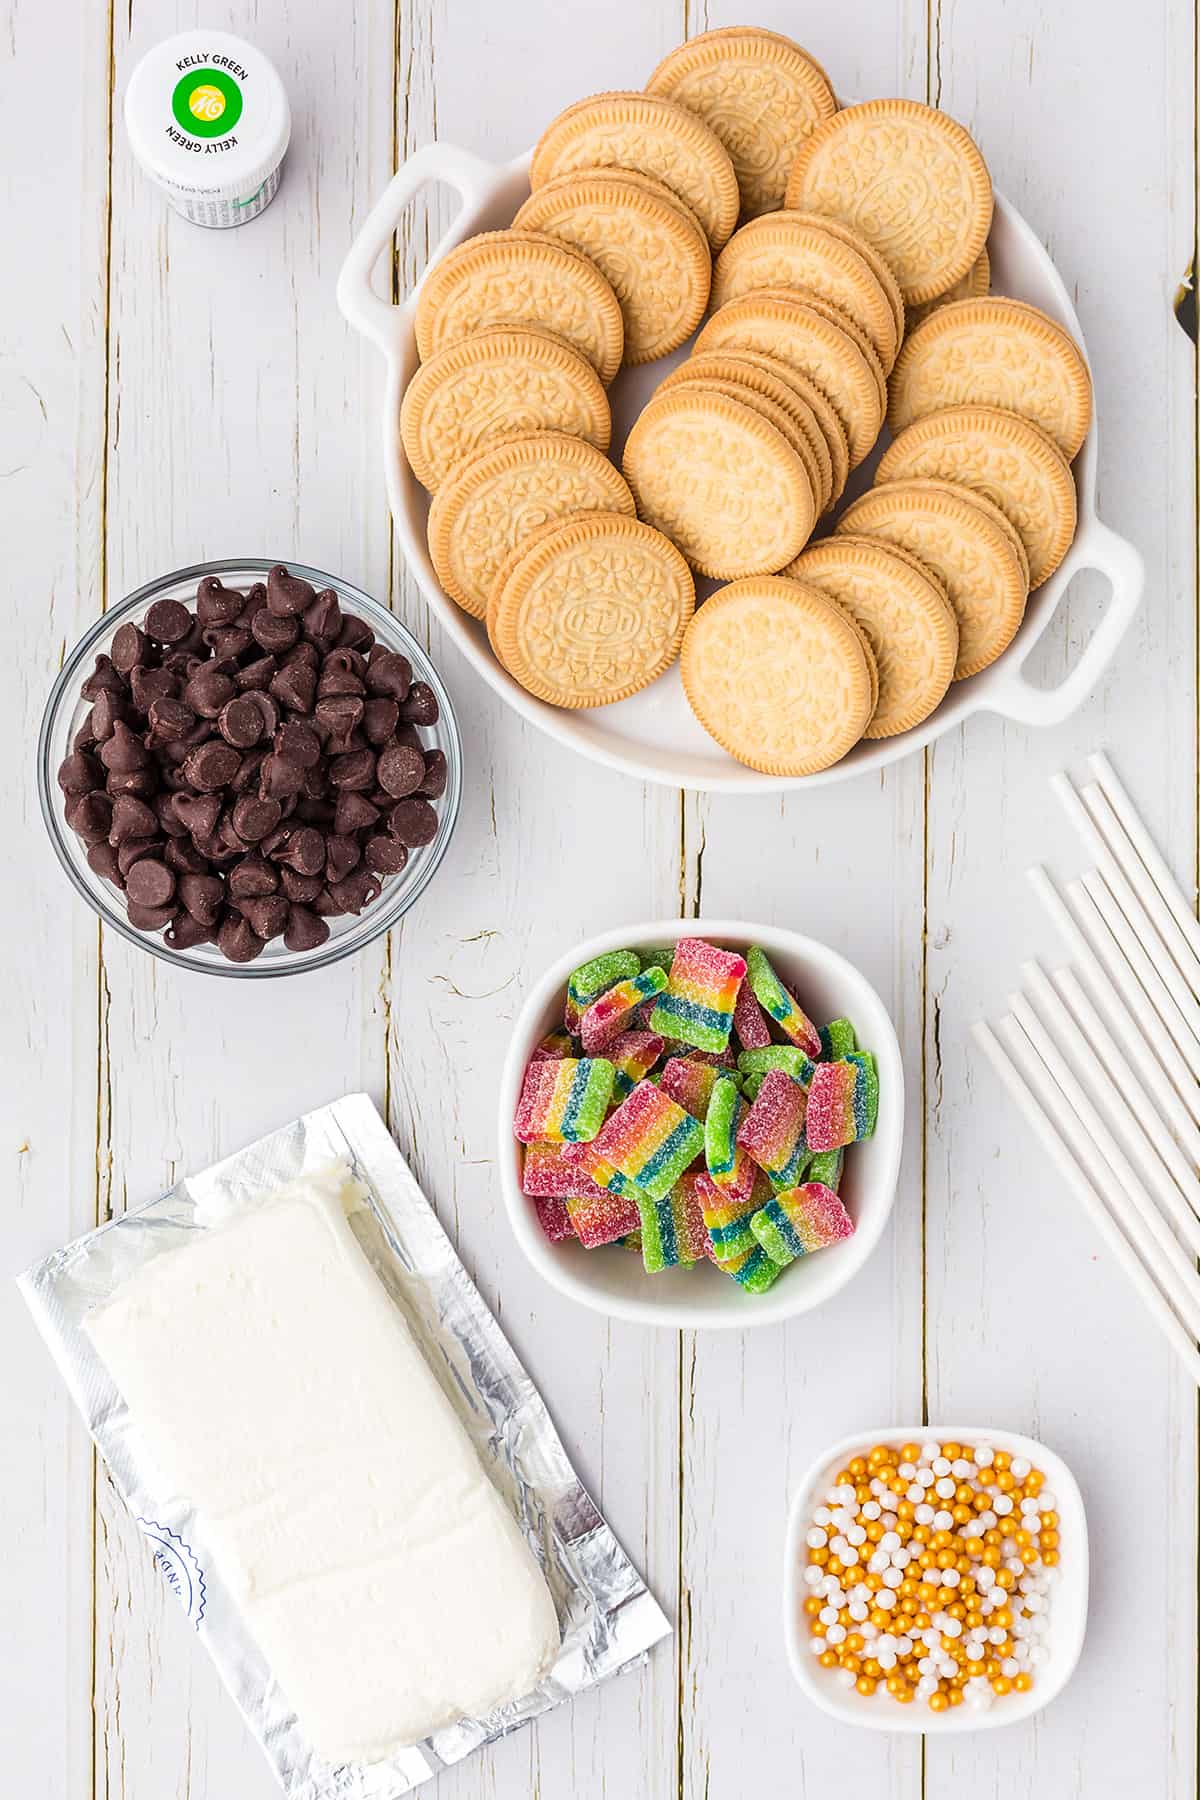
Golden Oreo Thins – We’re using the Thins so they don’t have quite so much filling. The filling is generally the best part, but the Thins work great for making Oreo pops!
Cream Cheese – It’s rich and creamy and it holds everything together in these Oreo pops! Start with softened cream cheese for easy mixing.
Chocolate Chips – I’m using semi-sweet chocolate chips for this but you could swap those out for dark or milk chocolate, or even white chocolate. You can also use candy melts, if you have those on hand.
Rainbow Gummy Candies – These rainbow gummies are a great way to decorate the Oreo pops! You can swap these out for other rainbow or St. Patrick’s day themed candies that you want.
Gold Sprinkles – You’ll sprinkle these on after coating the Oreo pops in chocolate!
Green Food Coloring – We added a little swirl of green in the middle of each cookie pop. Makes them so cute when you take a bite!

What We Love About This Recipe:
- You can easily adapt these Oreo pops for other holidays by switching up the food coloring, sprinkles, and candy decorations!
- This is a great no bake dessert recipe that the kids can help with.
Helpful Tools:
Food Processor – A processor will make quick work of crumbling the Golden Oreo cookies. We use ours to shred cheese, slice veggies, and more. It’s one of my favorite kitchen tools.
Cake Pop Sticks – You’ll need something to hold these Leprechaun Oreo pops with and these sticks work great! Popsicle sticks will also work well.
How to Make Oreo Pops:
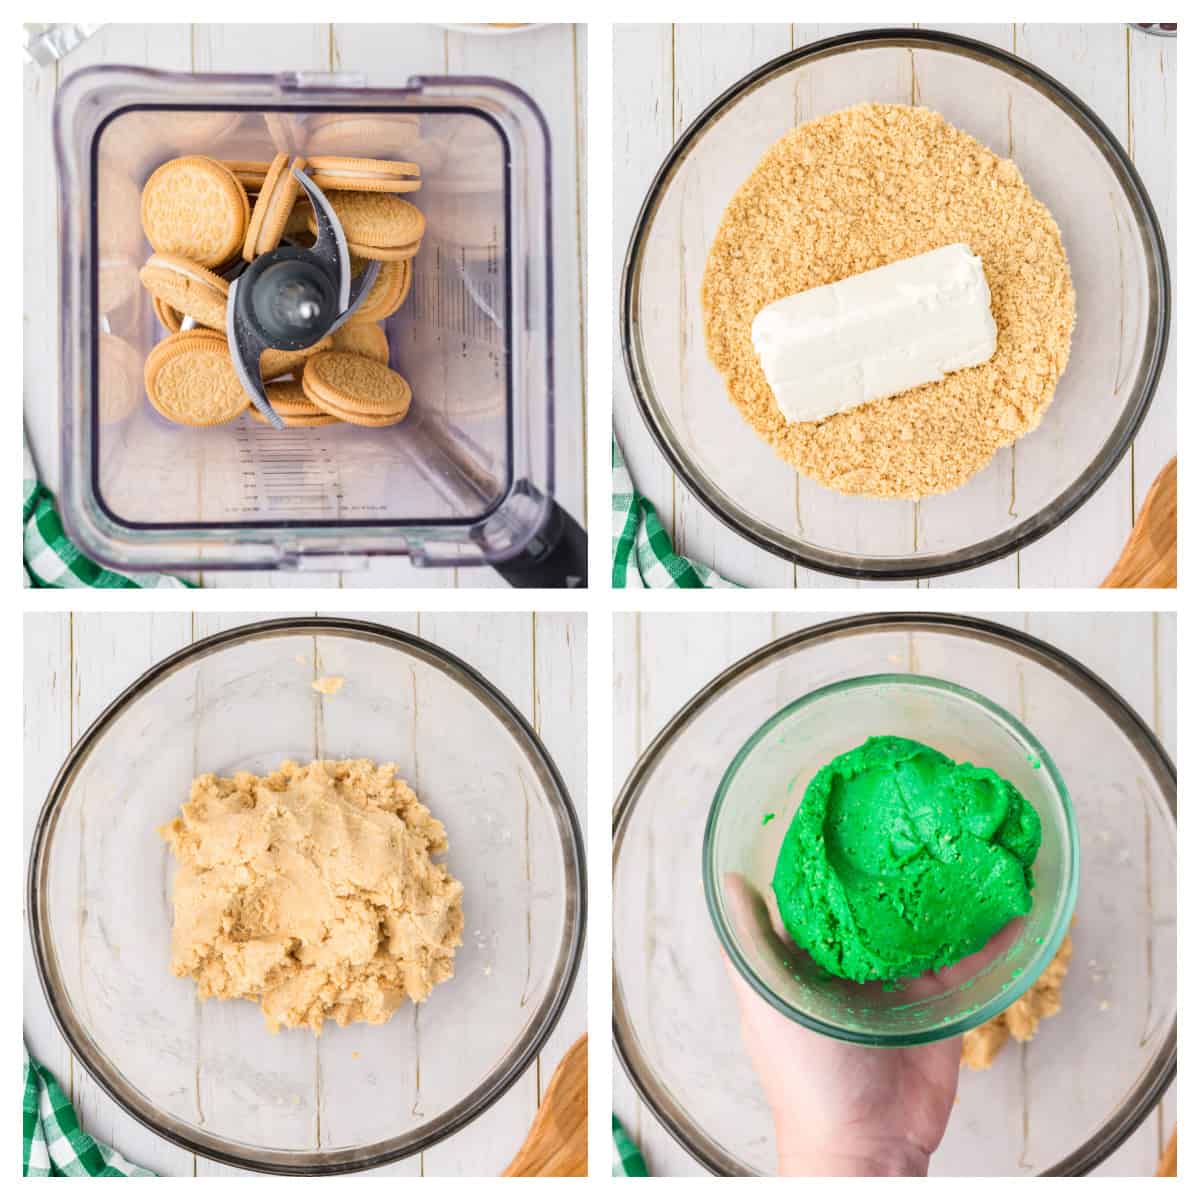
Crumble: Crush the Oreos into crumbs using a food processor or blender. If you don’t have a food processor you can place them in a ziplock bag and crush them with the bottom of a glass or a rolling pin.
Combine: After crumbling the cookies add them to a large bowl along with the softened cream cheese. Start combining those together until a soft dough texture forms.
Color: When the Oreo dough mix is ready divide it in half. Add the drops of green food coloring to one half of the dough and combine it well until the food coloring has saturated the whole mixture.

Roll: Make a ball of dough in your hand using half of the regular dough and half of the green. Press them together for a marbled effect. There should be enough dough to make 12 evenly sized balls of the mixed dough.
Place each of the balls on a cookie sheet lined with parchment paper.
Assemble: Use a small spoon or teaspoon to make an indent in the top of each of the balls of dough. Place a popsicle stick or rod into the center of each of each, then place them all in the freezer for about 20 minutes.
You can move on to melting the chocolate while they set in the freezer.
Chocolate: Add the chocolate chips to a microwave safe bowl and start heating in 30 second intervals until the chocolate has fully melted and is smooth. Watch it closely and don’t overheat or it will burn!
Dip: Remove the Oreo balls from the freezer. Use a fork or spoon to support each one as you dip them into the melted chocolate. Coat the entire ball in the chocolate, then allow any excess to drip back in to the bowl.
Place each of the chocolate coated Oreo balls onto the parchment lined sheet. Move on to decorating them in the next step before it hardens.

Decorate: You’ll want to add the sprinkles and rainbow candy or any other toppings to the Oreo balls while the chocolate is still melty. Add as much of the decoration as you like and then place them into the fridge to firm up.
Serve: After they’ve chilled for about an hour these Leprechaun Oreo Pops are ready to serve! They’re good cold right from the fridge or served at room temperature.
FAQs:
These are best stored in an airtight container in the refrigerator! They should stay fresh for at least a week.
If you prefer the standard chocolate Oreo cookie over the golden variety, you can use them! Skip coloring the dough green as it won’t be visible with the dark Oreos.
MORE St. Patrick’S Day RECIPES!
Check out our St. Patrick’s Day Snack Board, Lucky Charms Treats, or our Mint M&M Cookies! These are all fabulous for making St. Patrick’s Day a little more festive!
More Oreo Favorites!


St. Patrick’s Day Oreo Pops
Ingredients
- 1 package Golden Oreo Thins 13.1 ounces
- 6 ounces cream cheese softened
- 6 drops green food coloring
- 2 cups semi-sweet chocolate chips
- 12 rainbow gummy candies
- 1/4 cup gold sprinkles
Instructions
- Place Golden Oreo Thins in a food processor and pulse until crumbled and the texture resembles sand.
- In a large bowl, combine the oreo crumbs and cream cheese. Stir well until a soft dough forms.
- Divide this mixture in half and add green food coloring to one half. Blend it well until the green food coloring has saturated the entire amount of the oreo mixture.
- Split each set of dough into 12 small pieces. Roll together one piece of yellow and one piece of green dough to form a marbled ball using your hands.
- Place the balls on a cookie sheet lined with parchment paper and using a small spoon or teaspoon, make an indent at the top of each ball. Place a popsicle stick or rod into the center of each ball.
- Place the balls in your freezer for about 20 minutes while you melt the chocolate.
- In a medium-sized heat-safe bowl, melt the chocolate chips in the microwave in 30 second intervals, until fully melted and smooth.
- Using a fork or spoon to support each oreo ball, dip them into the chocolate, coating the entire ball, and then allow the excess chocolate to drip back into the bowl before placing them back onto the parchment paper to harden.
- Before the chocolate hardens, place rainbow candy and gold sprinkles onto the chocolate-covered oreo ball.
- Place them into your refrigerator for about an hour or until they have hardened. Serve chilled or at room temperature.
















Sharon says
Instant Pot tip
* How to melt chocolate in an Instant Pot for dipping
Pour 2 cups of water into the bottom of your Instant Pot. Turn your Instant Pot to the saute setting adjust to “more.”
Once the water starts simmering and you see the steam coming out. …
Place a glass or metal bowl that sits in/on the Instant Pot without falling in
Add the chocolate into the bowl. Stir every minute until the chocolate is smooth and melted. Turn the Instant Pot to the Keep Warm setting. Keep the melted chocolate on Keep Warm Setting itself until you finish dipping
Sharon Schroeter says
Karly, these are so cute! I avoid rainbows because of their connotation nowadays, but will find little shamrocks to use instead..
Your recipes are always great!
Karly says
Bring on all the rainbows for me! 🙂